
.NET Core C# + AWS SES - Send Email via SMTP with AWS Simple Email Service
In this tutorial we'll go through the steps to enable sending email via SMTP from a .NET Core API using the Amazon Simple Email Service.
The .NET Core API we'll be using is a boilerplate API I posted recently that sends an email for account verification, I won't cover the API code in detail here but for full documentation see ASP.NET Core 3.1 - Boilerplate API with Email Sign Up, Verification, Authentication & Forgot Password, and for quick details that focus on the email sending portion of the C# code see ASP.NET Core 3.1 - Send Emails via SMTP with MailKit.
This tutorial will be focused on the steps to configure SMTP in AWS SES and then test it with the example .NET Core API.
Verify Email Addresses in AWS SES
Sender/from addresses must be verified in AWS SES before you can send emails from them. For SES accounts with "Sandbox" access, recipient/to addresses also need to be verified.
Follow these steps to verify email addresses in AWS SES and check if your account has "Sandbox" or "Production" access.
- Sign into the AWS Management Console at https://aws.amazon.com/console/. If you don't have an account yet click the "Create a Free Account" button and follow the prompts.
- Go to the Simple Email Service section.
- Go to Email Addresses under Identity Management.
- Click Verify a New Email Address, enter the from address you will be using to send email from the .NET Core API, and click Verify This Email Address.
- Open your email inbox and click the verification link sent from AWS, then refresh the email addresses in the AWS SES Console and the verification status should change to verified.
- Go to Sending Statistics under Email Sending, if your Production Access is set to Sandbox, repeat steps 4 and 5 for the to email address/es you will be using.
Requesting production access in AWS SES
To request full access to be able to send to any (unverified) email address go to Sending Statistics under Email Sending and click Edit Account Details, for more info see https://docs.aws.amazon.com/ses/latest/DeveloperGuide/request-production-access.html.
Attempting to send to an unverified address from an account with "Sandbox" access results in the error: Message rejected: Email address is not verified. The following identities failed the check in region.
Create SMTP Credentials in AWS
SMTP credentials are the username and password that will be used by our .NET Core API to authenticate with AWS SES to send emails.
- Go to SMTP Settings under Email Sending.
- Click Create My SMTP Credentials, this will take you to the AWS Identity and Access Management (IAM) section to create a new user with access to send email.
- Click Create to setup your SMTP credentials. Optionally you can update the IAM Username or keep the default one generated by AWS.
- Click Show User SMTP Security Credentials and copy/download the username and password to use in the next step.
Download, Configure and Start the .NET Core Boilerplate API
Follow these steps to download the example .NET Core API, configure SMTP settings to use the AWS Simple Email Service, and start the API on your local development machine.
- Install the .NET Core SDK (if not already installed) from https://www.microsoft.com/net/download/core.
- Download or clone the .NET Core boilerplate API code from https://github.com/cornflourblue/aspnet-core-3-signup-verification-api
- Configure SMTP settings for email within the
AppSettingssection in the/appsettings.jsonfile.- Set
EmailFromto the from email address that you verified in AWS SES above. - Set
SmtpHostto the Server Name from the SMTP Settings section of the AWS SES console (e.g.email-smtp.[AWS REGION].amazonaws.com). - Set
SmtpUserto the username from the AWS SMTP Credentials you created above. - Set
SmtpPassto the password from the AWS SMTP Credentials you created above.
- Set
- Start the api by running
dotnet runfrom the command line in the project root folder (where the WebApi.csproj file is located), you should see the messageNow listening on: http://localhost:4000.
Send Email from .NET Core API with AWS SES
To send an email from the API we'll use Postman to make an HTTP POST request directly to the API to register a new account, which will send an account verification email to the new account email address.
Postman is a great tool for testing APIs, you can download it at https://www.postman.com/downloads.
Follow these steps to register a new account to send a verification email via SMTP with AWS Simple Email Service.
- Open a new request tab by clicking the plus (+) button at the end of the tabs.
- Change the http request method to "POST" with the dropdown selector on the left of the URL input field.
- In the URL field enter the address to the register route of your local API -
http://localhost:4000/accounts/register - Select the "Body" tab below the URL field, change the body type radio button to "raw", and change the format dropdown selector to "JSON".
- Enter a JSON object containing the required user properties (use the to email address you verified earlier) in the "Body" textarea, e.g:
{ "title": "Mr", "firstName": "Jason", "lastName": "Watmore", "email": "[email protected]", "password": "pass123", "confirmPassword": "pass123", "acceptTerms": true } - Click the "Send" button, you should receive a "200 OK" response with a "registration successful" message in the response body.
Postman after sending the request to the API
Here's a screenshot of Postman after the request is sent and the new user has been registered:

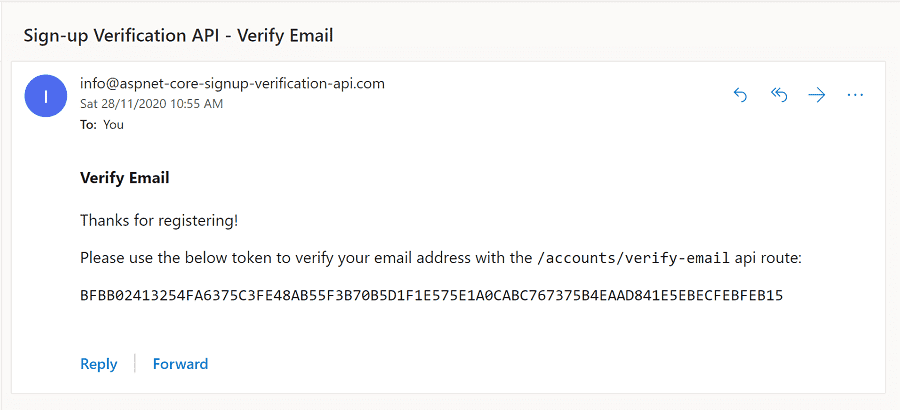
Email received from AWS SES
This is a screenshot of the verification email received from AWS SES with the token to verify the account:
Need Some ASP.NET Core Help?
Search fiverr for freelance ASP.NET Core developers.
Follow me for updates
When I'm not coding...
Me and Tina are on a motorcycle adventure around Australia.
Come along for the ride!