
.NET 6.0 - Basic Authentication Tutorial with Example API
Tutorial built with .NET 6.0
Other versions available:
- .NET: .NET 5.0, ASP.NET Core 3.1, 2.2
- Node: Node.js
In this tutorial we'll go through a simple example of how to implement custom Basic HTTP authentication in a .NET 6.0 API with C#.
The example API has just two endpoints/routes to demonstrate authenticating with basic http authentication and accessing a restricted route:
/users/authenticate- public route that accepts HTTP POST requests containing the username and password in the body. If the username and password are correct then the user details are returned./users- secure route that accepts HTTP GET requests and returns a list of all the users in the application if the HTTP Authorization header contains valid basic authentication credentials. If there are no basic auth credentials or the credentials are invalid then a 401 Unauthorized response is returned.
The tutorial project is available on GitHub at https://github.com/cornflourblue/dotnet-6-basic-authentication-api.
Tutorial Contents
- Tools required to develop .NET 6.0 applications
- Run the example API locally
- Test the .NET API with Postman
- Run an Angular app with the .NET API
- Run a Blazor app with the .NET API
- Run a React app with the .NET API
- Run a Vue.js app with the .NET API
- .NET Basic Authentication API project structure
Tools required to run the .NET 6.0 Basic Auth Example Locally
To develop and run .NET 6.0 applications locally, download and install the following:
- .NET SDK - includes the .NET runtime and command line tools
- Visual Studio Code - code editor that runs on Windows, Mac and Linux
- C# extension for Visual Studio Code - adds support to VS Code for developing .NET applications
Run the .NET Basic Authentication API Locally
- Download or clone the tutorial project code from https://github.com/cornflourblue/dotnet-6-basic-authentication-api
- Start the api by running
dotnet runfrom the command line in the project root folder (where the WebApi.csproj file is located), you should see the messageNow listening on: http://localhost:4000. Follow the instructions below to test with Postman or hook up with one of the example single page applications available (Angular, Blazor, React or Vue).
NOTE: You can also start the application in debug mode in VS Code by opening the project root folder in VS Code and pressing F5 or by selecting Debug -> Start Debugging from the top menu. Running in debug mode allows you to attach breakpoints to pause execution and step through the application code. For more info on debugging .NET in VS Code see VS Code + .NET - Debug a .NET Web App in Visual Studio Code.
Test the .NET 6.0 Basic Authentication API with Postman
Postman is a great tool for testing APIs, you can download it at https://www.postman.com/downloads.
Below are instructions on how to use Postman to authenticate a user with the api, and then make an authenticated request with basic authentication credentials to retrieve a list of users from the api.
How to authenticate a user with Postman
To authenticate a user with the basic authentication api and follow these steps:
- Open a new request tab by clicking the plus (+) button at the end of the tabs.
- Change the HTTP method to POST with the dropdown selector on the left of the URL input field.
- In the URL field enter the address to the authenticate route of your local API -
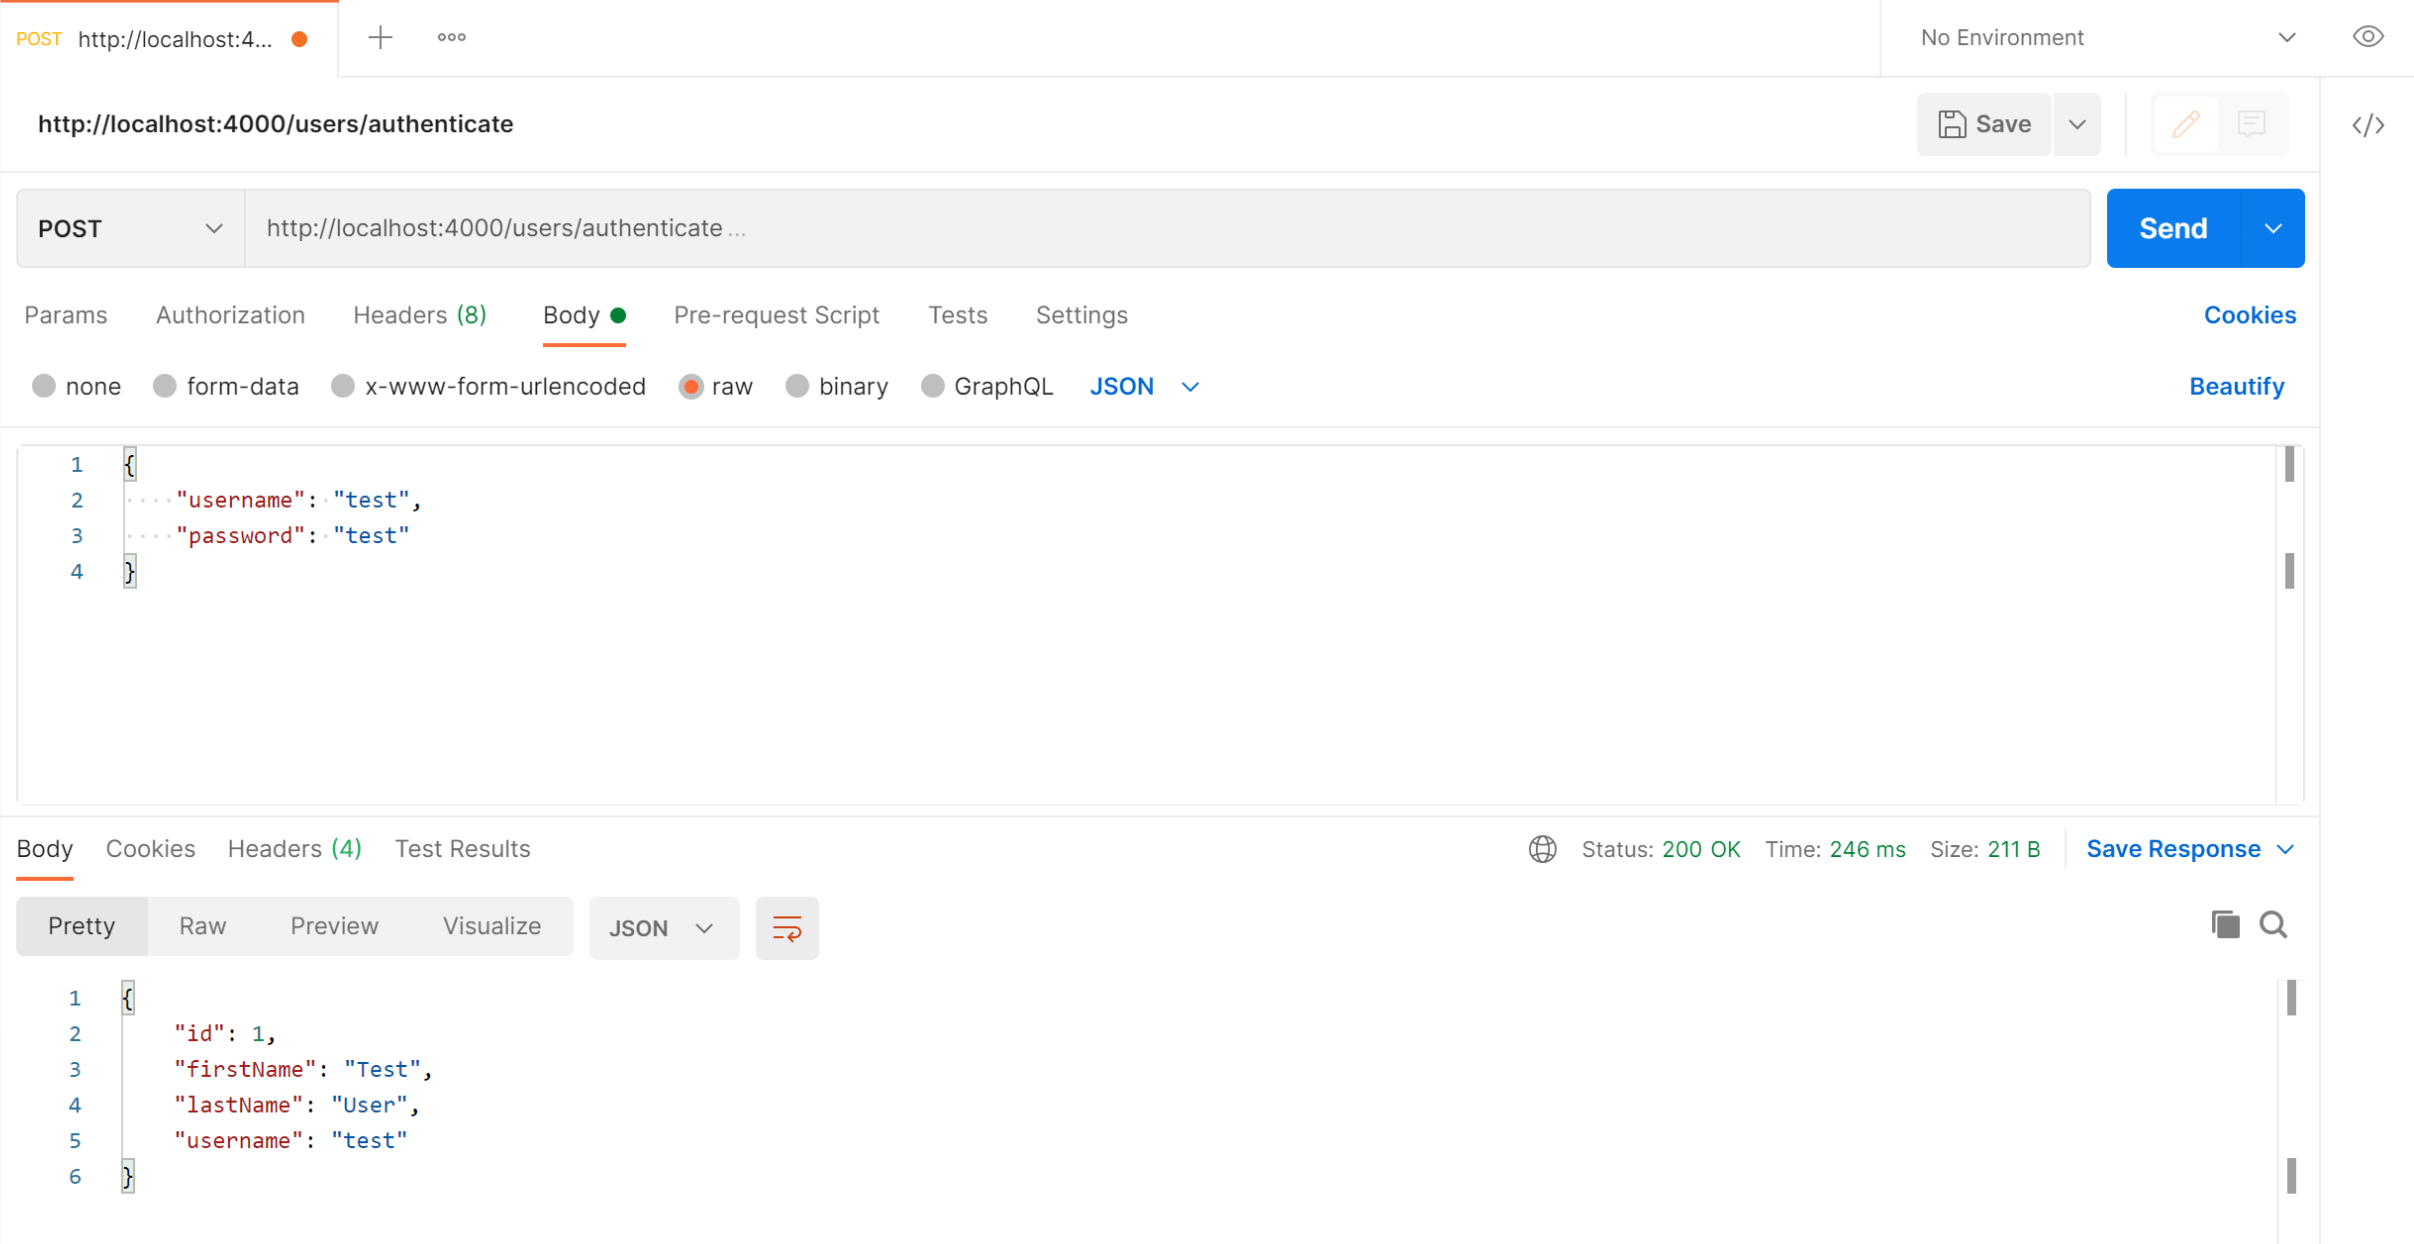
http://localhost:4000/users/authenticate. - Select the Body tab below the URL field, change the body type radio button to raw, and change the format dropdown selector to JSON.
- Enter a JSON object containing the test username and password in the Body textarea:
{ "username": "test", "password": "test" } - Click the Send button, you should receive a "200 OK" response containing the user details in the response body, this indicates that the username and password are correct.
Here's a screenshot of Postman after the request is sent and the user has been authenticated:
How to make an authenticated request to retrieve all users
To make an authenticated request using basic authentication credentials, follow these steps:
- Open a new request tab by clicking the plus (+) button at the end of the tabs.
- Change the HTTP method to GET with the dropdown selector on the left of the URL input field.
- In the URL field enter the address to the users route of your local API -
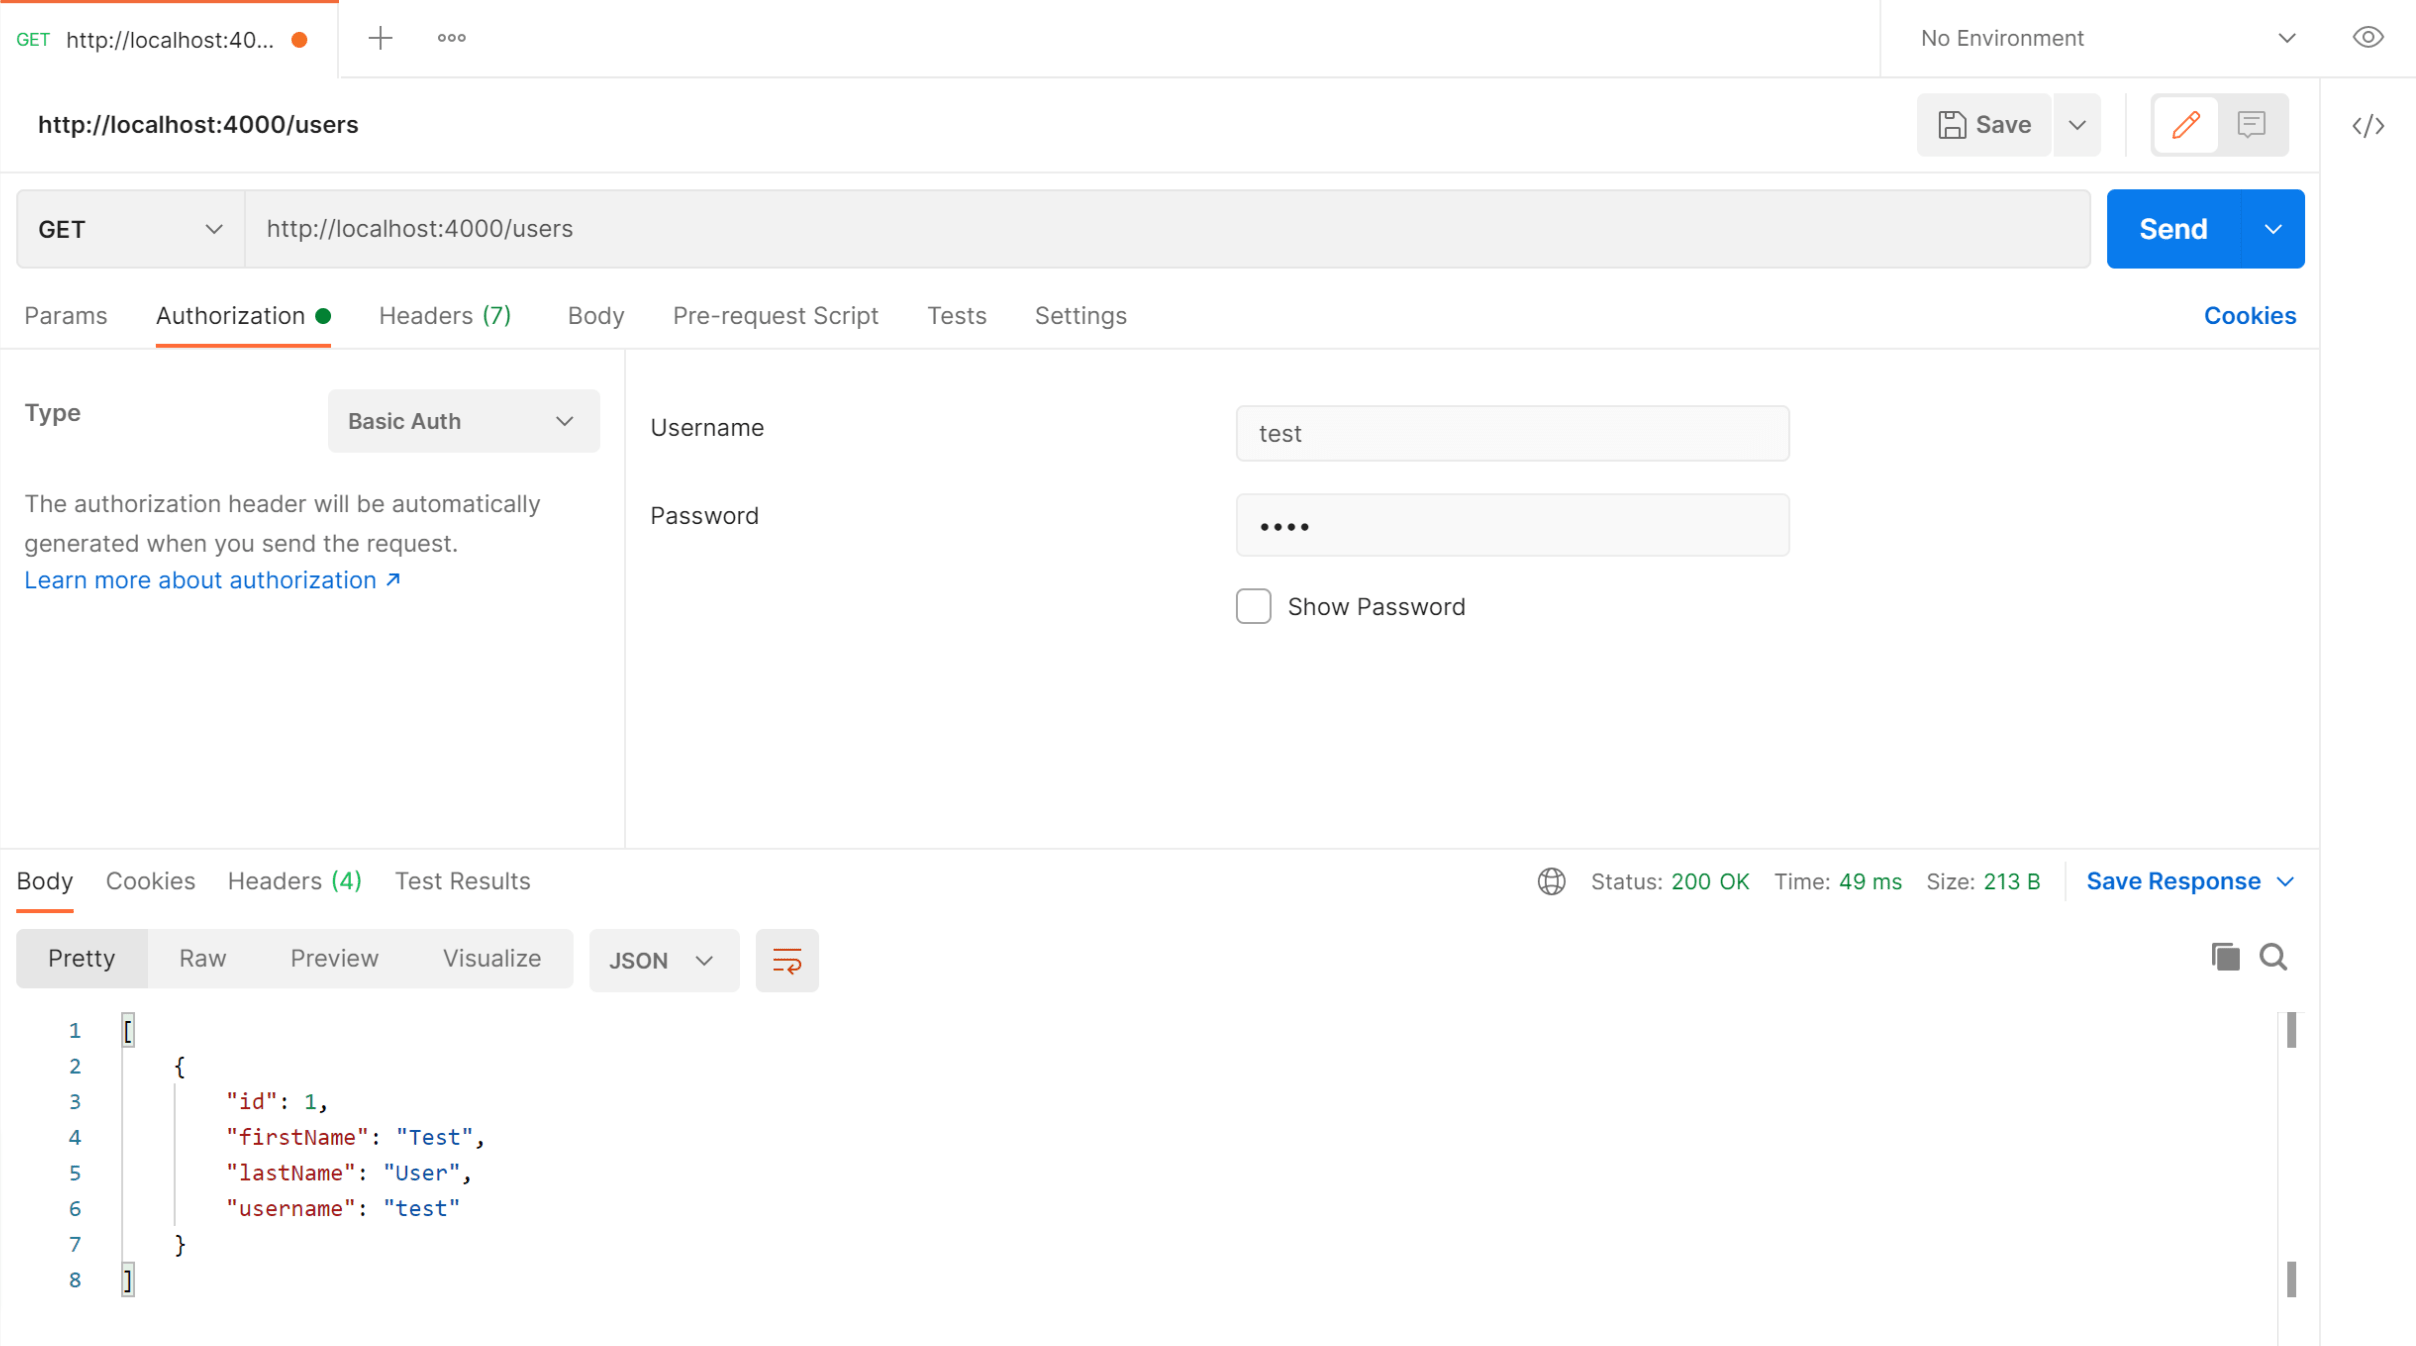
http://localhost:4000/users. - Select the Authorization tab below the URL field, set the Type selector to Basic Auth, and enter
testin the Username field andtestin the Password field. - Click the Send button, you should receive a "200 OK" response containing a JSON array with all the user records in the system (just the one test user in the example).
Here's a screenshot of Postman after making an authenticated request to get all users:
Run an Angular client app with the .NET Basic Auth API
For full details about the example Angular application see the tutorial Angular 10 - Basic HTTP Authentication Tutorial & Example. But to get up and running quickly just follow the below steps.
- Install Node.js and npm from https://nodejs.org.
- Download or clone the Angular 8 tutorial code from https://github.com/cornflourblue/angular-10-basic-authentication-example
- Install all required npm packages by running
npm installfrom the command line in the project root folder (where the package.json is located). - Remove or comment out the line below the comment
// provider used to create fake backendlocated in the/src/app/app.module.tsfile. - Start the application by running
npm startfrom the command line in the project root folder, this will launch a browser displaying the Angular example application and it should be hooked up with the .NET 6.0 Basic Auth API that you already have running.
Run a Blazor WebAssembly (WASM) client app with the .NET Basic Auth API
For full details about the example Blazor application see the post Blazor WebAssembly - Basic HTTP Authentication Tutorial & Example. But to get up and running quickly just follow the below steps.
- Download or clone the tutorial project code from https://github.com/cornflourblue/blazor-webassembly-basic-authentication-example
- Change the
"fakeBackend"setting to"false"in the/wwwroot/appsettings.jsonfile. - Start the app by running
dotnet runfrom the command line in the project root folder (where the BlazorApp.csproj file is located) - Open a new browser tab and navigate to the URL
http://localhost:5000, the Blazor app should be hooked up with the .NET 6.0 Basic Auth API that you already have running.
NOTE: To enable hot reloading during development so the Blazor app automatically restarts when a file is changed, start the app with the command dotnet watch run.
Run a React client app with the .NET Basic Auth API
For full details about the example React application see the post React + Recoil - Basic HTTP Authentication Tutorial & Example. But to get up and running quickly just follow the below steps.
- Install Node.js and npm from https://nodejs.org.
- Download or clone the React tutorial code from https://github.com/cornflourblue/react-recoil-basic-authentication-example
- Install all required npm packages by running
npm installfrom the command line in the project root folder (where the package.json is located). - Remove or comment out the 2 lines below the comment
// setup fake backendlocated in the/src/index.jsxfile. - Start the application by running
npm startfrom the command line in the project root folder, this will launch a browser displaying the React example application and it should be hooked up with the .NET 6.0 Basic Auth API that you already have running.
Run a Vue.js client app with the .NET Basic Auth API
For full details about the example Vue.js application see the post Vue.js - Basic HTTP Authentication Tutorial & Example. But to get up and running quickly just follow the below steps.
- Install Node.js and npm from https://nodejs.org.
- Download or clone the VueJS tutorial code from https://github.com/cornflourblue/vue-basic-authentication-example
- Install all required npm packages by running
npm installfrom the command line in the project root folder (where the package.json is located). - Remove or comment out the 2 lines below the comment
// setup fake backendlocated in the/src/index.jsfile. - Start the application by running
npm startfrom the command line in the project root folder, this will launch a browser displaying the VueJS example application and it should be hooked up with the .NET 6.0 Basic Auth API that you already have running.
.NET 6.0 Basic Authentication API Project Structure
The tutorial project is organised into the following folders:
Authorization - contains the classes responsible for implementing custom basic authentication and authorization in the api.
Controllers - define the end points / routes for the web api, controllers are the entry point into the web api from client applications via http requests.
Models - represent request and response models for controller methods, request models define the parameters for incoming requests, and response models can be used to define what data is returned.
Services - contain business logic, validation and data access code.
Entities - represent the application data.
Click any of the below links to jump down to a description of each file along with its code:
- Authorization
- Controllers
- Entities
- Models
- Services
- appsettings.json
- omnisharp.json
- Program.cs
- WebApi.csproj
.NET Allow Anonymous Attribute
The custom [AllowAnonymous] attribute is used to allow anonymous access to specified action methods of controllers that are decorated with the [Authorize] attribute. It's used in the users controller to allow anonymous access to the authenticate action method. The custom authorize attribute below skips authorization if the action method is decorated with [AllowAnonymous].
I created a custom allow anonymous (instead of using the built in one) for consistency and to avoid ambiguous reference errors between namespaces.
namespace WebApi.Authorization;

[AttributeUsage(AttributeTargets.Method)]
public class AllowAnonymousAttribute : Attribute
{ }
.NET Custom Authorize Attribute
The custom [Authorize] attribute is used to restrict access to controllers or specified action methods. Only authorized requests are allowed to access action methods that are decorated with the [Authorize] attribute.
When a controller is decorated with the [Authorize] attribute all action methods in the controller are restricted to authorized requests, except for methods decorated with the custom [AllowAnonymous] attribute above.
Authorization is performed by the OnAuthorization method which checks if there is an authenticated user attached to the current request (context.HttpContext.Items["User"]). An authenticated user is attached by the custom basic auth middleware if the request contains valid credentials.
On successful authorization no action is taken and the request is passed through to the controller action method, if authorization fails a 401 Unauthorized response is returned.
namespace WebApi.Authorization;

using Microsoft.AspNetCore.Mvc;
using Microsoft.AspNetCore.Mvc.Filters;
using WebApi.Entities;

[AttributeUsage(AttributeTargets.Class | AttributeTargets.Method)]
public class AuthorizeAttribute : Attribute, IAuthorizationFilter
{
    public void OnAuthorization(AuthorizationFilterContext context)
    {
        // skip authorization if action is decorated with [AllowAnonymous] attribute
        var allowAnonymous = context.ActionDescriptor.EndpointMetadata.OfType<AllowAnonymousAttribute>().Any();
        if (allowAnonymous)
            return;

        var user = (User)context.HttpContext.Items["User"];
        if (user == null)
        {
            // not logged in - return 401 unauthorized
            context.Result = new JsonResult(new { message = "Unauthorized" }) { StatusCode = StatusCodes.Status401Unauthorized };

            // set 'WWW-Authenticate' header to trigger login popup in browsers
            context.HttpContext.Response.Headers["WWW-Authenticate"] = "Basic realm=\"\", charset=\"UTF-8\"";
        }
    }
}
.NET Custom Basic Auth Middleware
The custom basic authentication middleware attempts to validate user credentials in the HTTP Authorization header of the request, user credentials in basic authentication are the base64 encoded username and password separated by a colon (:), for example the username and password test:test is base64 encoded to the string dGVzdDp0ZXN0 which is sent in the Authorization header.
If validation is successful the authenticated user object is attached to the HttpContext.Items collection to make it accessible within the scope of the current request. If validation fails or there is no Authorization header, the request is only allowed to access public (anonymous) routes because there is no user object attached to the HTTP context, the authorization logic that checks for the user object is in the custom authorize attribute. Attempting to access a secure route with invalid credentials results in a 401 Unauthorized response.
namespace WebApi.Authorization;

using System.Net.Http.Headers;
using System.Text;
using WebApi.Services;

public class BasicAuthMiddleware
{
    private readonly RequestDelegate _next;

    public BasicAuthMiddleware(RequestDelegate next)
    {
        _next = next;
    }

    public async Task Invoke(HttpContext context, IUserService userService)
    {
        try
        {
            var authHeader = AuthenticationHeaderValue.Parse(context.Request.Headers["Authorization"]);
            var credentialBytes = Convert.FromBase64String(authHeader.Parameter);
            var credentials = Encoding.UTF8.GetString(credentialBytes).Split(':', 2);
            var username = credentials[0];
            var password = credentials[1];

            // authenticate credentials with user service and attach user to http context
            context.Items["User"] = await userService.Authenticate(username, password);
        }
        catch
        {
            // do nothing if invalid auth header
            // user is not attached to context so request won't have access to secure routes
        }

        await _next(context);
    }
}
.NET Users Controller
The .NET users controller defines and handles all routes / endpoints for the api that relate to users, this includes authentication and standard CRUD operations. Within each route the controller calls the user service to perform the action required, this enables the controller to stay 'lean' and completely separated from the business logic and data access code.
The controller actions are secured with basic authentication using the [Authorize] attribute, with the exception of the Authenticate method which allows public access by overriding the [Authorize] attribute on the controller with the [AllowAnonymous] attribute on the action method. I chose this approach so any new action methods added to the controller will be secure by default unless explicitly made public.
namespace WebApi.Controllers;

using Microsoft.AspNetCore.Mvc;
using WebApi.Authorization;
using WebApi.Models;
using WebApi.Services;

[Authorize]
[ApiController]
[Route("[controller]")]
public class UsersController : ControllerBase
{
    private IUserService _userService;

    public UsersController(IUserService userService)
    {
        _userService = userService;
    }

    [AllowAnonymous]
    [HttpPost("authenticate")]
    public async Task<IActionResult> Authenticate([FromBody]AuthenticateModel model)
    {
        var user = await _userService.Authenticate(model.Username, model.Password);

        if (user == null)
            return BadRequest(new { message = "Username or password is incorrect" });

        return Ok(user);
    }

    [HttpGet]
    public async Task<IActionResult> GetAll()
    {
        var users = await _userService.GetAll();
        return Ok(users);
    }
}
.NET User Entity
The user entity class represents the data for a user in the application. Entity classes are used to pass data between different parts of the application (e.g. between services and controllers) and can be used to return http response data from controller action methods.
The [JsonIgnore] attribute prevents the password property from being serialized and returned with user data in api responses.
namespace WebApi.Entities;

using System.Text.Json.Serialization;

public class User
{
    public int Id { get; set; }
    public string FirstName { get; set; }
    public string LastName { get; set; }
    public string Username { get; set; }

    [JsonIgnore]
    public string Password { get; set; }
}
.NET Authenticate Model
The authenticate model defines the parameters for incoming POST requests to the /users/authenticate route, it is attached to the route by setting it as the parameter to the Authenticate action method of the users controller. When an HTTP POST request is received by the route, the data from the body is automatically bound to an instance of the AuthenticateModel class, validated and passed to the method.
.NET Data Annotations are used to automatically handle model validation, the [Required] attribute sets both the username and password as required fields so if either are missing a validation error message is returned from the api.
namespace WebApi.Models;

using System.ComponentModel.DataAnnotations;

public class AuthenticateModel
{
    [Required]
    public string Username { get; set; }

    [Required]
    public string Password { get; set; }
}
.NET User Service
The user service contains a method for authenticating user credentials, and a method for getting all users in the application.
I hardcoded the array of users in the example to keep it focused on basic http authentication, in a production application it is recommended to store user records in a database with hashed passwords. For an extended example that includes support for user registration and stores data with Entity Framework check out .NET 6.0 - User Registration and Login Tutorial with Example API.
The top of the file contains an interface that defines the user service, below that is the concrete user service class that implements the interface.
On successful authentication the Authenticate method returns the user details, the client application should then include the base64 encoded user credentials in the HTTP Authorization header of subsequent api requests to access secure endpoints.
namespace WebApi.Services;

using WebApi.Entities;

public interface IUserService
{
    Task<User> Authenticate(string username, string password);
    Task<IEnumerable<User>> GetAll();
}

public class UserService : IUserService
{
    // users hardcoded for simplicity, store in a db with hashed passwords in production applications
    private List<User> _users = new List<User>
    {
        new User { Id = 1, FirstName = "Test", LastName = "User", Username = "test", Password = "test" }
    };

    public async Task<User> Authenticate(string username, string password)
    {
        // wrapped in "await Task.Run" to mimic fetching user from a db
        var user = await Task.Run(() => _users.SingleOrDefault(x => x.Username == username && x.Password == password));

        // on auth fail: null is returned because user is not found
        // on auth success: user object is returned
        return user;
    }

    public async Task<IEnumerable<User>> GetAll()
    {
        // wrapped in "await Task.Run" to mimic fetching users from a db
        return await Task.Run(() => _users);
    }
}
.NET 6 App Settings
Root configuration file containing application settings for all environments.
{
    "Logging": {
        "LogLevel": {
            "Default": "Information",
            "Microsoft.AspNetCore": "Warning"
        }
    }
}
OmniSharp Config
This file contains configuration options for the C# extension in VS Code. The useBundledOnly option tells the C# extension to use the bundled version of MSBuild instead of the global version to prevent errors if you have an older version of MSBuild installed globally (e.g. as part of Visual Studio).
{
    "msbuild": {
        "useBundledOnly": true
    }
}
.NET 6 Program
The .NET 6 Program file contains top-level statements which are converted by the new C# 10 compiler into a Main() method and class for the .NET program. The Main() method is the entry point for a .NET application, when an app is started it searches for the Main() method to begin execution. The top-level statements can be located anywhere in the project but are typically placed in the Program.cs file, only one file can contain top-level statements within a .NET application.
The WebApplication class handles app startup, lifetime management, web server configuration and more. A WebApplicationBuilder is first created by calling the static method WebApplication.CreateBuilder(args), the builder is used to configure services for dependency injection (DI), a WebApplication instance is created by calling builder.Build(), the app instance is used to configure the HTTP request pipeline (middleware), then the app is started by calling app.Run().
I wrapped the add services... and configure HTTP... sections in curly brackets {} to group them together visually, the brackets are completely optional.
Internally the WebApplicationBuilder class calls the ConfigureWebHostDefaults() extension method which configures hosting for the web app including setting Kestrel as the web server, adding host filtering middleware and enabling IIS integration. For more info on the default builder settings see https://docs.microsoft.com/aspnet/core/fundamentals/host/generic-host#default-builder-settings.
using WebApi.Authorization;
using WebApi.Services;

var builder = WebApplication.CreateBuilder(args);

// add services to DI container
{
    var services = builder.Services;
    services.AddCors();
    services.AddControllers();

    // configure DI for application services
    services.AddScoped<IUserService, UserService>();
}

var app = builder.Build();

// configure HTTP request pipeline
{
    // global cors policy
    app.UseCors(x => x
        .AllowAnyOrigin()
        .AllowAnyMethod()
        .AllowAnyHeader());

    // custom basic auth middleware
    app.UseMiddleware<BasicAuthMiddleware>();

    app.MapControllers();
}

app.Run("http://localhost:4000");
.NET 6 Basic Auth API csproj
The csproj (C# project) is an MSBuild based file that contains target framework and NuGet package dependency information for the application. The ImplicitUsings feature is enabled which tells the compiler to auto generate a set of global using directives based on the project type, removing the need to include a lot of common using statements. The global using statements are auto generated when you build the project and can be found in the file /obj/Debug/net6.0/WebApi.GlobalUsings.g.cs.
<Project Sdk="Microsoft.NET.Sdk.Web">
    <PropertyGroup>
        <TargetFramework>net6.0</TargetFramework>
        <ImplicitUsings>enable</ImplicitUsings>
    </PropertyGroup>
</Project>
Need Some .NET Help?
Search fiverr for freelance .NET developers.
Follow me for updates
When I'm not coding...
Me and Tina are on a motorcycle adventure around Australia.
Come along for the ride!